Oct 19, 2018 | 3D & Paper Crafting Ideas, Hand Stamped Card, New Products, Stampin' Up!, Thanksgiving cards |
Hi Friends,
When flipping through our Holiday Catalog, I fell in LOVE with the Thanksgiving card on page 44.

It’s the top left card- using the Merry Merlot card stock.
I think it’s so much fun to COLOR and that;s just what I did!
Using our Watercolor Pencils, it was fun –just like being back in kindergarten!
Then I gently used my Aqua Painter and with soft, one directional strokes, covered over the colored layers.
First I apologize for the poor image –I was in a hurry to get it posted for my Demonstrators–am a work in progress!

Directions:
I used Crumb Cake as the card base at 8 1/2 x 5 1/2, scored at 4 1/2
2.Then I took a piece of Pumpkin pIe at 5 x 3 /3/4 and ran it through the Big Shot using the new Tin Tile Embossing Folder.
3.Then I took a Sponge Dauber and used Pumpkin Pie ink to distress the embossed layer.
4.I did use Tear & Tape to adhere it to the base layer. I think with thicker embossing folders, extra adhesive is a great way to insure it sticks properly.
5.Next I took the wagon stamp and message and used Stazon to stamp on a layer of Very Vanilla.
THEN -for me the REAL FUN began! COLORING!
6.I used the WATERCOLOR PENCILS and colored away.
NO fuss, no worry, just easy broadstrokes over the images–kinda like an ombray effect.
7.THEN I took my Aqua Painter and very gently and in one direction only, blended the colors a tad more.
8.I made a tiny bow with the Braided Linen Thread and attached with a Glue Dot.
9.This layer was attached to a piece of Crumb Cake. The edges were distressed using the blade of my Snips–just to give it a bit more dimension. Dimensionals were used to pop it on top of the textured piece.
These are the products I used to make it:
Contact me with any questions or concerns!
You can click on any product above and it will take you directly to my online store.

Oct 19, 2018 | Christmas Cards, Hand Stamped Card, New Products, Stampin' Up!, Stamping Techniques |
Hi Friends,
This too darn cute Stampin’ Up! Signs of Santa Christmas card makes me laugh!
It’s fun to color and fun to paste!
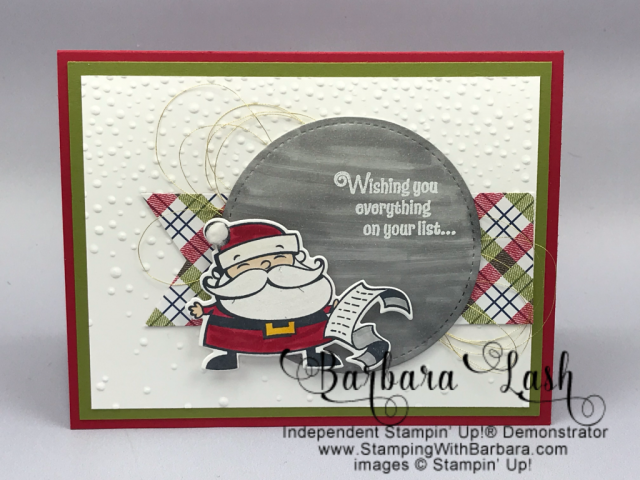
I used the Big Shot with the Santa’s Signpost Framelits to cut out Santa .

Then I colored him using the Stampin’ Blends and added a puff of cotton to his cap with a drop of Fine Tip Glue.
I also used a banner from the Festive Farmhouse DSP with a bit of gold thread in front of it .

Santa is popped up on the Christmas card with Dimensionals and of COURSE I just had to add Wink of Stella here and there!
What do you think?
Let me know if you need any help or want to make this card.
If you still do NOT have a catalog, let me know …I’ll hand deliver or pop it in the mail!
Supplies Used:
Oct 17, 2018 | Christmas Cards, Hand Stamped Card, New Products, Stampin' Up! |
Hi Friends,
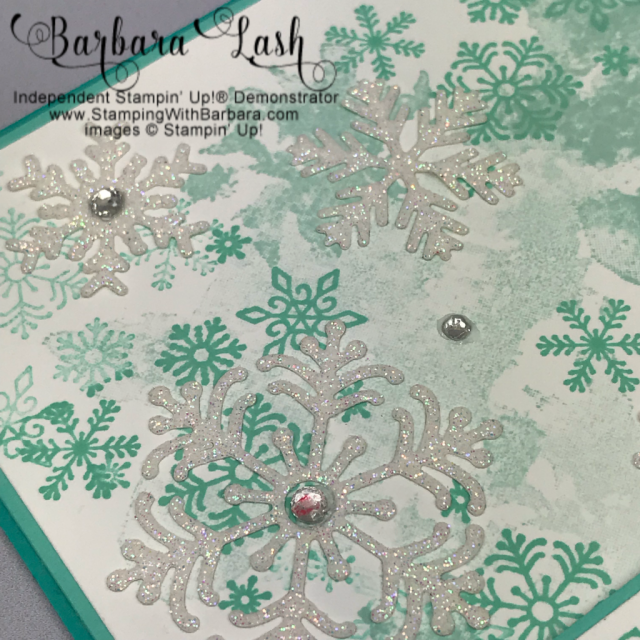
I think this Stampin’ Up! Beautiful Blizzard card is simply ELEGANT!
I used Coastal Cabana, Pool Party and Whisper White Card stock, plus the gorgeous stamp set and framelts to create this seasonal card.

I first took the base Coastal Cabana layered a piece of Pool Party on top. Then I stamped the white layer with Coastal Cabana and Pool Party –randomly all over the front with a bit of a diagonal angle.

Here’s a view of the snowflakes with the Sparkle Glimmer Paper and a few Rhinestones for a subtle yet elegant addition.
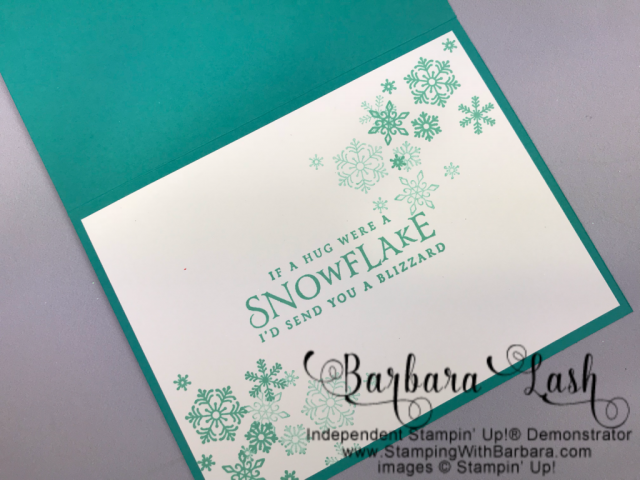
Here’s the inside:
Please contact me if you’d like to make this! Or click on any link below to go directly to my online store.
Supplies Used:
Apr 27, 2018 | Birthday, Hand Stamped Card |
Hi Friends,
This is a BEAUTIFUL stamp set and Bundle – ” Cake Soiree”
The stamps are so festive and elegant and very easy to use.
This card uses a base of Whisper White card stock cut to the usual 8 1/2′ x 5 1/4′ and scored at 4 1/4′.
Then a layer of Berry Burst cut to 5 1/4′ x 4 and adhered to the base
Next I took a piece of Marina Mist , cut to 5 x 3/3/4″ and ran it through the Big Shot using the Layered Leaves Dynamic Embossing Folder.
Next is a piece of white card stock cut to 3 x 4 1/2″.
I stamped the cake image with Black Archival Ink then used Old Olive, Berry Burst, Marina Mist and Daffodil Delight Markers with an Aqua Painter. (I love coloring!!!)… and of COURSE some Wink of Stella!
This layer was attached using Dimensionals.
I used SIlver Foil Paper backed with Multipurpose Adhesive Sheets to cut out the cake pedestal and plate with the corresponding framelits.
It’s very easy using those Adhesive sheets on small ( or not so small) images. No mess at all!
All done!
What do you think?

Please feel free to add a comment and be sure to subscribe to my YouTube channel!
Supplies Used:
My Stampin’ Blog showcase goes here
Apr 25, 2018 | Hand Stamped Card |
Hi Friends,
This card is fun fun fun to make!
I used Floral Statements stamp set along with the Ruffled Dynamic Embossing Folder.
1. The base of this card is Whisper White cut at 8 1/2 x 4 1/4″ and scored at 4 1/4″.
2. Then I took a piece of Rich Razzleberry card stock cut to 5 1/4″ x 4 and ran it through the Big Shot using the Ruffled Folder.
3. I corner rounded the edges of both the Razzleberry and white layers–just for added dimension.
4. Next I stamped the Hello image with Black Archival ink and then the FUN really began!
5. Using Old Olive and Rich Razzleberry Stampin Blends, I colored the flowers and leaves. Of course I HAD to add a touch of Wink of Stella here and there.
6. To finish off the centers of the flowers I added a gold Faceted Gem with our Fine Tip glue.
What do you think?

Please feel free to add a comment and subscribe to my YouTube Channel!
i LOVE hearing from YOU!
Supplies Used:
Apr 23, 2018 | Hand Stamped Card |
Hi Friends,
I love FRUIT and I LOVE this card!
What’s better on a hot summery day than a glass of yummy iced tea or lemonade???
I used the Jar of Love stamp set plus the Everyday Jars Framelits.
And did you notice the straw? How too darn cute is this??????
You may also notice that the embossing folder is retried as well as the Designer Series paper BUT you can use any paper and newer folders. I just love the design of this and since we ARE approaching nicer weather, I plan on making a lot of these cards!
Here are the instructions”
- Base is Whisper White cut at 5 1/2″ x 8 1/2″ and scored at 4 1/4″.
- Next layer is Calypso Coral cut at 5 1/4 x 4″.
- Pick a cute Embossing Folder (Polka Dot Basics would be real cute) and run it through the Bog Shot.
- Then adhere that layer with Snail.
- Next take a piece of Designer Series Paper ( Whole Lot of Lovely is very similar) and cut to 5 1/4 x 2″. Layer it on as you like –either left orientation or a bit towards the center as I did.
- Then stamp a lemon slice form the Lemon Zest stamp set and color it with Crushed Curry Marker. Of course I had to use Wink of Stella for some added shine!
- Next I stamped a mason jar with Staz-On ink onto a piece of vellum then used the framelit to cut it out.
- I sponged the inside of the vellum with a combo of Crushed Curry and Calypso Coral ink to make it look like sweet pink lemonade!
- I took a plastic straw and cut to fit the jar and adhered the whole thing very carefully with Dimensionals.
- Added the slice of lemon and a message …and voila!
 What do YOU think?????
Please feel free to add a comment, like and share my post!
Also please subscribe to my YouTube channel as well as!!
Supplies Used: